The Trials and Tribulations of a Baker-Turned-Cook

Monday, March 17, 2008

Stay Tuned!

Between work, my last semester of grad school coursework, and other exciting developments, I have had no free time! When you add to that the fact that my laptop is broken and had to be sent away for who knows how long, it means not much blogging has been going on (although the cooking and baking have continued).

But fear not! There are good things to come! I am on break this week with no intentions except to relax and catch up on stuff at home.

Here's a taste of what's to come:
  • Coconut Shrimp with Pineapple Salsa
  • Strawberry Shortcake
  • Mashed Sweet Potatoes
  • Carrot Cake

Sunday, February 24, 2008

Cinnamon Goodness...

These cinnamon rolls are gooey and fantastic. I always double the icing, because the more icing, the better in my book. :) These are a bit labor intensive, but most of the work is done the night before.

Before icing:


After icing:

Overnight Cinnamon Rolls

Source: Good Eats

Dough:

  • 4 large egg yolks, room temperature
  • 1 large whole egg, room temperature
  • 2 ounces sugar (approximately 1/4 C)
  • 3 ounces unsalted butter, melted (approximately 6 tablespoons)
  • 6 ounces buttermilk, room temperature (approximately 3/4 of a cup)
  • 20 ounces all-purpose flour (approximately 4 C), plus additional for dusting
  • 1 package instant dry yeast (approximately 2 1/4 teaspoons)
  • 1 1/4 teaspoons kosher salt
  • vegetable oil or cooking spray

Filling:

  • 8 ounces light brown sugar (approximately 1 cup packed)
  • 1 tablespoon ground cinnamon
  • pinch salt
  • 3/4 ounce unsalted butter, melted (approximately 1 1/2 Tbsp.)

Icing: (I double this recipe)

  • 2 1/2 ounces cream cheese (approximately 1/4 C)
  • 3 tablespoons milk
  • 5 1/2 ounces powdered sugar (approximately 1 1/2 C)

  1. For the dough: in the bowl of a stand mixer with the whisk attachment, whisk the egg yolks, whole egg, sugar, butter, and buttermilk. Add approximately 2 cups of the flour along with the yeast and salt; whisk until moistened and combined. Remove the whisk attachment and replace with a dough hook. Add all but 3/4 cup of the remaining flour and knead on low speed for 5 minutes. Check the consistency of the dough, add more flour if necessary; the dough should feel soft and moist but not sticky. Knead on low speed 5 minutes more or until the dough clears the sides of the bowl. Turn the dough out onto a lightly floured work surface; knead by hand about 30 seconds. Lightly oil a large bowl. Transfer the dough to the bowl, lightly oil the top of the dough, cover and let double in volume, 2 to 2 1/2 hours.
  2. Combine the brown sugar, cinnamon and salt in a medium bowl. Mix until well incorporated. Set aside until ready to use.
  3. Butter a 9 by 13-inch glass baking dish. Turn the dough out onto a lightly floured work surface. Gently shape the dough into a rectangle with the long side nearest you. Roll into an 18 by 12-inch rectangle. Brush the dough with the 3/4-ounce of melted butter, leaving 1/2-inch border along the top edge. Sprinkle the filling mixture over the dough, leaving a 3/4-inch border along the top edge; gently press the filling into the dough. Beginning with the long edge nearest you, roll the dough into a tight cylinder. Firmly pinch the seam to seal and roll the cylinder seam side down. Very gently squeeze the cylinder to create even thickness. Using a serrated knife, slice the cylinder into 1 1/2-inch rolls; yielding 12 rolls. Arrange rolls cut side down in the baking dish; cover tightly with plastic wrap and store in the refrigerator overnight or up to 16 hours.
  4. Remove the rolls from the refrigerator and place in an oven that is turned off. Fill a shallow pan 2/3-full of boiling water and set on the rack below the rolls. Close the oven door and let the rolls rise until they look slightly puffy; approximately 30 minutes. Remove the rolls and the shallow pan of water from the oven.
  5. Preheat the oven to 350 degrees F.
  6. When the oven is ready, place the rolls on the middle rack and bake until golden brown, or until the internal temperature reaches 190 degrees F on an instant-read thermometer, approximately 30 minutes.
  7. While the rolls are cooling slightly, make the icing by whisking the cream cheese in the bowl of a stand mixer until creamy. Add the milk and whisk until combined. Sift in the powdered sugar, and whisk until smooth. Spread over the rolls and serve immediately.

Chicken Stew

I love this Giada recipe. It is so fresh and healthy, yet feels hearty. It also reheats very well for lunch or dinner the next day. I served it with cornbread.


Chicken Stew
  • 2 Tbsp. olive oil
  • 2 stalks celery, chopped
  • 1 carrot, peeled and chopped
  • 1 small onion, chopped
  • salt and freshly ground black pepper
  • 1 (14-oz) can chopped tomatoes
  • 1 (14-oz) can low-sodium chicken broth
  • 1/2 C fresh basil leaves, torn into pieces
  • 1 Tbsp. tomato paste
  • 1 bay leaf
  • 1/2 tsp. dried thyme leaves
  • 2 chicken breast with ribs (about 1 1/2 lbs total)
  • 1 (15 oz) can organic kidney beans, drained (rinsed if not organic)
  • Serving suggestion: Crusty bread
  1. Heat the oil in a heavy 5 1/2-quart saucepan over medium heat. Add the celery, carrot, and onion. Saute the vegetables until the onion is translucent, about 5 minutes. Season with salt and pepper, to taste. Stir in the tomatoes with their juices, chicken broth, basil, tomato paste, bay leaf, and thyme. Add the chicken breasts; press to submerge.
  2. Bring the cooking liquid to a simmer. Reduce the heat to medium-low and simmer gently uncovered until the chicken is almost cooked through, turning the chicken breasts over and stirring the mixture occasionally, about 25 minutes. Using tongs, transfer the chicken breasts to a work surface and cool for 5 minutes. Discard the bay leaf. Add the kidney beans to the pot and simmer until the liquid has reduced into a stew consistency, about 10 minutes.
  3. Discard the skin and bones from the chicken breasts. Shred or cut the chicken into bite- size pieces. Return the chicken meat to the stew. Bring the stew just to a simmer. Season with salt and pepper, to taste.
  4. Ladle the stew into serving bowls and serve with the bread.

Coconut Layer Cake with Coconut Buttercream Frosting

I have been wanting to try this Martha Stewart recipe for awhile. The cake was delicious, but soooo dense. I made it into a three-layer round cake instead of a two-layer sheet cake. I used my tried-and-true buttercream recipe (adapted from AllRecipes). How could something with that much butter and eggs be anything less than divine?


Coconut Cake

Source: Martha Stewart's Baking Handbook (2005)

  • 3 sticks (1 1/2 C) unsalted butter, room temperature, plus more for pans
  • 3 1/2 C all-purpose flour, plus more for pans
  • 1 Tbsp. plus 1 tsp. baking powder
  • 1 tsp salt
  • 1 C packed sweetened, shredded coconut (for cake batter)
  • 2 C packed, sweetened, shredded coconut (for cake topping)
  • 2 2/3 C sugar
  • 4 large whole eggs, plus 4 large egg whites
  • 1 Tbsp. pure vanilla extract
  • 1 1/2 C unsweetened coconut milk
  1. Preheat the oven to 350. Butter two 9x9x2 inch cake pans (I used three 9-inch round pans); line the bottoms with parchment paper. Butter parchment, and dust with flour, tapping out excess; set aside. Into a large bowl, sift together the flour, baking powder, and salt. Pulse shredded coconut in a food processor until finely chopped. Stir chopped coconut into the flour mixture until combined; set aside.
  2. In the bowl of an electric mixer fitted with the paddle attachment, beat the butter and sugar until light and fluffy, about 4 minutes, scraping down the sides of the bowl as needed. Add the whole eggs, egg whites, and vanilla; beat until fully incorporated. With the mixer on low speed, add the flour mixture in two parts, alternating with the coconut milk, and beginning and ending with the flour; beat until combined after each addition.
  3. Divide batter between prepared pans, and smooth with an offset spatula. Bake, rotating pans halfway through, until cakes are golden brown and a cake tester inserted in the centers comes out clean, about 55 minutes. Transfer pans to a wire rack to cool 30 minutes. Invert cakes onto the rack; peel off the parchment. Reinvert cakes and let them cool completely, top sides up.
  4. While cake is cooling, toast 2 C shredded coconut in a 350 oven for 8 to 10 minutes, stirring occasionally.
  5. Using a serrated knife, trim the tops of the cake layers to make level. Place one layer on a cake plate, and spread top with 1 1/2 C of frosting. Sprinkle with toasted coconut. Repeat with second layer. Place third layer on top, and frost cake with remaining frosting. Sprinkle remaining toasted coconut on top.
  6. Cake can be kept in the refrigerator, covered with a cake dome, for up to 3 days.

Coconut Buttercream Frosting

Adapted from AllRecipes.com

  • 1/2 C butter
  • 1/2 C shortening
  • 1/8 tsp. salt
  • 1 tsp. coconut extract
  • 5 C powdered sugar
  • 1/4 C milk
  1. In a large bowl, cream butter and shortening until light and fluffy. Add salt, coconut extract, powdered sugar, and milk. Beat well.


Tuesday, February 5, 2008

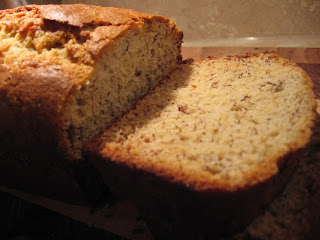
Banana Bread

I love this recipe for banana bread because it is light and there are no spices to mask the banana flavor. And unlike most bread recipes that make two loaves (leaving me with an extra loaf every time), this one just makes one -- perfect for two people.

Toni's Banana Bread
Source: Cooking Light
  • 1 cup mashed ripe banana (about 2 medium)
  • 2/3 C sugar
  • 1/4 C vegetable oil
  • 1 large egg white
  • 1 large egg
  • 1 3/4 C all-purpose flour
  • 1 1/4 tsp. cream of tartar
  • 3/4 tsp. baking soda
  • 1/2 tsp. salt
  • Cooking spray
  1. Preheat oven to 350°.
  2. Combine first 5 ingredients in a large bowl; beat with a mixer at medium speed until smooth.
  3. Lightly spoon flour into dry measuring cups, and level with a knife. Combine flour, cream of tartar, baking soda, and salt in a bowl, stirring with a whisk. Add the flour mixture to banana mixture, stirring just until moist. Spoon the batter into an 8 x 4-inch loaf pan coated with cooking spray.
  4. Bake at 350° for 40 minutes or until a wooden pick inserted in center comes out clean. Cool 10 minutes in pan on a wire rack; remove from pan. Cool completely on rack.

Note: To freeze individual slices, place in heavy-duty zip-top plastic bags. Remove excess air from bags; seal and freeze for up to 1 month. To thaw, let stand at room temperature.

Chicken Enchilada Casserole

This dish is quite spicy, but so satisfying. The original recipe calls for traditional enchiladas (rolled and placed side-by-side in a dish), but I find it is much easier to make a casserole. My changes are listed below; click here for the original recipe.

Chicken Enchilada Casserole
Adapted from Tyler Florence's Chicken Enchiladas

  • 3 tablespoons vegetable oil
  • 1 1/2 pounds skinless boneless chicken breast
  • Salt and pepper
  • 2 teaspoons cumin powder
  • 2 teaspoons garlic powder
  • 1 teaspoon Mexican Spice Blend
  • 1 red onion, chopped
  • 2 cloves garlic, minced
  • 1 cup frozen corn, thawed
  • 5 canned whole green chiles, seeded and coarsely chopped
  • 4 canned chipotle chiles, seeded and minced
  • 1 (28-ounce) can diced tomatoes
  • 1/2 teaspoon all-purpose flour
  • 18 corn tortillas
  • 1 can enchilada sauce
  • 2 cups shredded Cheddar and Jack cheeses
  • Garnishes: chopped cilantro leaves, chopped scallions, sour cream, chopped tomatoes
  1. Coat large saute pan with oil. Season chicken with salt and pepper. Brown chicken over medium heat, allow 7 minutes each side or until no longer pink. Sprinkle chicken with cumin, garlic powder and Mexican spices before turning. Remove chicken to a platter, allow to cool. Saute onion and garlic in chicken drippings until tender. Add corn and chiles. Stir well to combine. Add canned tomatoes, saute 1 minute. Pull chicken breasts apart by hand into shredded strips. Add shredded chicken to saute pan, combine with vegetables. Dust the mixture with flour to help set.
  2. Ladle a small amount of enchilada sauce into the bottom of a 9 x 13 glass baking dish. Layer six corn tortillas on top of the sauce. Spread half of the chicken mixture over the tortillas and top with 3/4 C cheese. Repeat layering -- six more corn tortillas, remaining chicken, 3/4 C cheese. Top with the remaining six tortillas. Pour the enchilada sauce over the top, and sprinkle remaining 1/2 C cheese over the top.
  3. Bake for 20 minutes in a preheated 350 degree F oven until cheese melts. Serve with sour cream.

Chicken Piccata

This dish has so much flavor! I serve it over couscous to soak up the delicious juices. I usually cut down on the butter and oil used, and I have not noticed a big difference.

Chicken Piccata
Recipe from Giada DeLaurentis
  • 2 skinless and boneless chicken breasts, butterflied and then cut in half
  • Sea salt and freshly ground black pepper
  • All-purpose flour, for dredging
  • 6 tablespoons unsalted butter
  • 5 tablespoons extra-virgin olive oil
  • 1/3 cup fresh lemon juice
  • 1/2 cup chicken stock
  • 1/4 cup brined capers, rinsed
  • 1/3 cup fresh parsley, chopped
  1. Season chicken with salt and pepper. Dredge chicken in flour and shake off excess.
  2. In a large skillet over medium high heat, melt 2 tablespoons of butter with 3 tablespoons olive oil. When butter and oil start to sizzle, add 2 pieces of chicken and cook for 3 minutes. When chicken is browned, flip and cook other side for 3 minutes. Remove and transfer to plate. Melt 2 more tablespoons butter and add another 2 tablespoons olive oil. When butter and oil start to sizzle, add the other 2 pieces of chicken and brown both sides in same manner. Remove pan from heat and add chicken to the plate.
  3. Into the pan add the lemon juice, stock and capers. Return to stove and bring to boil, scraping up brown bits from the pan for extra flavor. Check for seasoning. Return all the chicken to the pan and simmer for 5 minutes. Remove chicken to platter. Add remaining 2 tablespoons butter to sauce and whisk vigorously. Pour sauce over chicken and garnish with parsley.

Baked Mostaccioli

Lots of cooking has been happening lately, but unfortunately I've had little time to blog about it! I'll try to catch up...

I think in the Northeast, baked ziti is more popular, but in the Midwest we used to have this dish all the time. This dish is very simple to make and is perfect for a chilly winter night. You could definitely add in veggies, spices, etc. to suit your taste.

Baked Mostaccioli
Like my Grandma used to make...
  • 1 lb mostaccioli
  • 1 jar marinara sauce (I used tomato basil -- you can use homemade if you have it)
  • 1 lb hot Italian sausage (you can also used ground beef or sweet sausage, if you prefer)
  • 1 C grated Parmesan cheese
  • 12 oz sliced mozzarella cheese
  1. Preheat oven to 350.
  2. Cook pasta according to package directions.
  3. While pasta cooks, slice sausage and brown slices in a skillet until cooked through (alternatively, brown ground beef and drain).
  4. Combine pasta, sauce, sausage, and parmesan cheese in a large bowl. Spread into a 9 x 13 glass baking dish coated with cooking spray. Layer slices of mozzarella cheese over the pasta mixture.
  5. Bake for 30 minutes, or until heated through. Place under the broiler for a few minutes, until cheese is bubbly and starting to brown.

Tuesday, January 15, 2008

Baked Potato Soup and Sweet Dinner Rolls

This recipe for baked potato soup was so thick and creamy -- you won't believe it is "light." This recipe for rolls is my "go-to" recipe. The rolls have just a hint of sweetness -- they pair perfectly with savory dishes. I do not have a breadmaker, so my altered directions are in red. I have made these into crescents (as directed), knots, and, as today, clover rolls. I used about a third of the dough for 6 rolls, and I froze the remainder.


Baked Potato Soup

Source: Cooking Light
  • 4 baking potatoes (about 2 1/2 pounds)
  • 2/3 C all-purpose flour (about 3 oz)
  • 6 C 2% reduced-fat milk
  • 1 C (4 oz) reduced-fat shredded extrasharp cheddar cheese, divided
  • 1 tsp. salt
  • 1/2 tsp. freshly ground black pepper
  • 1 C reduced-fat sour cream
  • 3/4 C chopped green onions, divided
  • 6 bacon slices, cooked and crumbled
  • Cracked black pepper (optional)
  1. Preheat oven to 400.
  2. Pierce potatoes with a fork; bake at 400° for 1 hour or until tender. Cool. Peel potatoes; coarsely mash.
  3. Lightly spoon flour into dry measuring cups; level with a knife. Place flour in a large Dutch oven; gradually add milk, stirring with a whisk until blended. Cook over medium heat until thick and bubbly (about 8 minutes). Add mashed potatoes, 3/4 cup cheese, salt, and 1/2 teaspoon pepper, stirring until cheese melts. Remove from heat.
  4. Stir in sour cream and 1/2 cup onions. Cook over low heat 10 minutes or until thoroughly heated (do not boil). Ladle 1 1/2 cups soup into each of 8 bowls. Sprinkle each serving with 1 1/2 teaspoons cheese, 1 1/2 teaspoons onions, and about 1 tablespoon bacon. Garnish with cracked pepper, if desired.

Sweet Dinner Rolls

Source: AllRecipes

  • 1/2 C warm water (110 degrees)
  • 1/2 C warm milk
  • 1 egg
  • 1/3 C butter, softened
  • 1/3 C white sugar
  • 1 tsp. salt
  • 3 3/4 C all-purpose flour
  • 1 (.25 oz) package active dry yeast
  • 1/4 C butter, softened
  1. Place water, milk, egg, 1/3 C butter, sugar, salt, flour, and yeast in the pan of the bread machine in the order recommended by the manufacturer. Select Dough/Knead and First Rise Cycle; press Start.
  2. IF YOU DO NOT HAVE A BREAD MACHINE: Combine water, milk, and yeast in the bowl of a stand mixer fitted with the paddle attachment. Let sit five minutes, or until foamy. Add egg, 1/3 C butter, and sugar; mix until combined. In a small bowl, combine flour and salt. Slowly add to the egg mixture until combined. Switch to the bread hook, and knead on medium for 10 minutes.
  3. When cycle finishes, turn dough out onto a lightly floured surface. Divide dough in half. Roll each half into a 12 inch circle, spread 1/4 C softened butter over entire round. Cut each circle into 8 wedges. Roll wedges starting at wide end; roll gently but tightly. Place point-side down on ungreased cookie sheet. Cover with clean kitchen towel and put in a warm place, let rise 1 hour. Meanwhile, preheat oven to 400 degrees. (You can also shape into knots and place on cookie sheet, or shape into balls and place in muffin tins that have been sprayed with cooking spray. Allow to rise for one hour, and brush with melted butter before baking.)
  4. Bake in preheated oven for 10 to 15 minutes, until golden.

Blueberry Coffee Cake Muffins

I am not really a fan of struesel toppings on muffins. These are perfect with a dusting of powdered sugar. I use frozen blueberries because they are big and plump and I can get them year-round.


Blueberry Coffee Cake Muffins

Source: Barefoot Contessa (Food Network)

  • 12 Tbsp. (1 1/2 sticks) unsalted butter, at room temperature
  • 1 1/2 C sugar
  • 3 extra-large eggs, at room temperature
  • 1 1/2 tsp. pure vanilla extract
  • 8 oz (about 1 C) sour cream
  • 1/4 C milk
  • 2 1/2 C all-purpose flour
  • 2 tsp. baking powder
  • 1/2 tsp. baking soda
  • 1/2 tsp. kosher salt
  • 2 half-pints fresh blueberries, picked through for stems (I used about 2 C frozen blueberries -- do not thaw first)
  1. Preheat the oven to 350 degrees F. Place 16 paper liners in muffin pans.
  2. In the bowl of an electric mixer fitted with the paddle attachment, cream the butter and sugar until light and fluffy, about 5 minutes. With the mixer on low speed, add the eggs 1 at a time, then add the vanilla, sour cream, and milk. In a separate bowl, sift together the flour, baking powder, baking soda, and salt. With the mixer on low speed add the flour mixture to the batter and beat until just mixed. Fold in the blueberries with a spatula and be sure the batter is completely mixed.
  3. Scoop the batter into the prepared muffin pans, filling each cup just over the top, and bake for 25 to 30 minutes, until the muffins are lightly browned on top and a cake tester comes out clean.

Barcelona Hot Chocolate

Yesterday was a rare occasion -- Dave and I BOTH had snow days! After a perfect "snow day" lunch of grilled cheese and tomato soup, I decided to make a nice little snack. The Barcelona Hot Chocolate was a nice little afternoon pick-me-up. It tasted very similar to a mocha from a coffee shop.


Barcelona Hot Chocolate

Source: Cooking Light

  • 2/3 C boiling water
  • 2 oz good quality dark or bittersweet chocolate, finely chopped
  • 1 1/3 C 1% low-fat milk
  • 1 C brewed espresso or strong coffee
  • 1/4 C unsweetened cocoa powder
  • 1/4 packed brown sugar
  • 1 2-inch piece orange rind strip (I left this out and added 1/2 tsp. ground cinnamon)
  • 1/4 C frozen fat-free whipped topping, thawed
  • Cocoa power (optional)
  1. Combine 2/3 cup boiling water and chopped chocolate in a medium saucepan, stirring until chocolate melts. Add milk and next 4 ingredients (through rind); cook over medium-low heat, stirring with a whisk. Heat 5 minutes or until tiny bubbles form around edge of pan, stirring frequently (do not boil). Discard rind. Pour 1 cup mixture into each of 4 mugs. Spoon 1 tablespoon whipped topping over each serving. Dust with cocoa powder, if desired.


Tuesday, January 8, 2008

Grilled Salmon with Soy-Brown Sugar Marinade

We eat quite a bit of salmon in our household, mostly because I love fish, and salmon is one of the few types of fish thought to be safe for women who are pregnant or trying to conceive. This is our very favorite salmon recipe. It is so quick and easy, and it leaves the salmon with a wonderful sweet-salty crust. I served this with steamed asparagus and Israeli couscous for a quick and healthy meal. I usually grill the salmon, but given the crappy weather, I cooked it on the stove this time, and it still came out great.

Grilled Salmon with Soy-Brown Sugar Marinade

Source: Allrecipes

  • 1 1/2 pounds salmon fillets (we also use salmon steaks from time to time)
  • lemon pepper to taste
  • garlic powder to taste
  • salt to taste
  • 1/3 C soy sauce
  • 1/3 C brown sugar
  • 1/3 C water
  • 1/4 C vegetable oil
  1. Season salmon fillets with lemon pepper, garlic powder, and salt.
  2. In a small bowl, stir together soy sauce, brown sugar, water, and vegetable oil until sugar is dissolved. Place fish in a large, resealable plastic bag with the soy sauce mixture, seal, and turn to coat. Refrigerate at least 2 hours.
  3. Preheat grill for medium heat.
  4. Lightly oil grill grate. Place salmon on the preheated grill, and discard marinade. Cook salmon for 6 to 8 minutes per side, or until the fish flakes easily with a fork.

Brownie Challenge Recipe #2 -- Deep Dish Brownies

Well, folks, the search may be over before it really even began -- I think I may have found the perfect brownie recipe! This recipe was flaky on the top, chewy on the edges, and dense and fudgy in the middle. I got this from Kayte's blog, and I believe she adapted it from a recipe on Allrecipes. I'm going to try baking them in a bigger pan next time with the hopes that they will come out even chewier. These were simply AWESOME. The definitely get 5 stars!


Deep Dish Brownies

Source: Allrecipes (adaptations from Kayte's blog)

  • 3/4 C butter, melted
  • 1 1/2 C sugar
  • 1 1/2 tsp. vanilla extract
  • 2 eggs
  • 3/4 C all purpose flour
  • 1/2 C unsweetened cocoa powder
  • 1/2 tsp. salt
  • 1/2 C semisweet chocolate chips
  1. Preheat oven to 350. Grease an 8-inch square pan.
  2. In a large bowl, blend melted butter, sugar, and vanilla. Beat in eggs, one at a time. Combine the flour, cocoa powder, and salt in a separate bowl. Gradually blend dry mixture into the egg mixture. Stir in chocolate chips. Spread the batter into the prepared pan.
  3. Bake in preheated oven for 40-45 minutes, or until brownies begin to pull away from the sides of the pan. Let brownies cool, then cut into squares. Enjoy!

Cheese-Garlic Biscuits

I saw these on MrsPresley's blog and as soon as I read that they were like Red Lobster's biscuits I knew I HAD to make them immediately. To be honest, though, I can't take too much credit -- my lovely husband whipped these up while I was cooking dinner. We served them with Chicken Stuffed Shells -- I'm not going to share that recipe, because I was not overly crazy about it. But, back to the biscuits -- they were AWESOME and so easy! We cut the recipe in half since it was just the two of us, but we could have easily eaten an entire batch.


Cheese-Garlic Biscuits
Source: Bisquick

  • 2 C Bisquick
  • 2/3 C milk
  • 1/2 C shredded cheddar cheese (2 oz)
  • 2 Tbsp. butter or margarine, melted
  • 1/8 tsp. garlic powder
  • pinch dried parsley
  1. Heat oven to 450.
  2. Stir Bisquick mix, milk, and cheese until soft dough forms. Drop dough by 9 spoonfuls onto ungreased cookie sheet.
  3. Bake 8 to 10 minutes, or until golden brown. Stir together butter and garlic powder (and parsley); brush over warm biscuits.


Friday, January 4, 2008

Linguine with Shrimp and Lemon Oil

I love, love, love this recipe from Giada De Laurentis. It is VERY lemony, though. If you do not LOVE lemon, either cut the lemon in half, or walk away from this recipe. I cut the entire recipe in half since there are only two of us, and it was the perfect amount. This also gave me a chance to use my new pasta bowls. :)


Linguine with Shrimp and Lemon Oil

For the lemon oil:

  • 1/2 C extra virgin olive oil
  • 1 lemon, zested
  1. Combine the olive oil and lemon zest in a small bowl and reserve.

For the pasta:

  • 1 pound linguine pasta (I used whole-wheat linguine)
  • 2 Tbsp. olive oil
  • 2 shallots, diced
  • 2 garlic cloves, minced
  • 16 oz frozen shrimp
  • 1/4 C lemon juice (about 2 lemons)
  • 1 lemon, zested
  • 1 tsp. salt
  • 1/2 tsp. freshly ground black pepper
  • 3 oz arugula (about 3 packed cups)
  • 1/4 C chopped fresh flat-leaf parsley
  1. Bring a large pot of salted water to a boil over high heat. Add the pasta and cook until tender but still firm to the bite, stirring occasionally, about 8 to 10 minutes (whole-wheat pasta takes a few extra minutes -- about 11 to 12). Drain pasta, reserving 1 C of the cooking liquid.
  2. Meanwhile, in a large, heavy skillet, warm the 2 Tbsp. olive oil over medium heat. Add the shallots and garlic and cook for 2 minutes. Add the shrimp and cook until pink, about 5 minutes. Add the cooked linguine, lemon juice, lemon zest, salt, and pepper. Toss to combine. Turn off the heat and add the arugula. Using a mesh sieve, strain the lemon zest out of the reserved lemon olive oil and add the oil to the pasta. The zest can be discarded. Add the chopped parsley to the pasta and toss to combine. Serve immediately.

Brownie Challenge Recipe #1 -- Hershey's Best Brownies

Confession: I love boxed brownies. I am ashamed to admit it, but I have yet to find a from-scratch recipe that, in my opinion, compares to boxed brownies. And oh, how I've tried! So, I've set out to complete the Brownie Challenge -- I WILL find the perfect fudgy brownie recipe. Thanks to the ladies on The Nest WC Board, I have my first five recipes. I let DH choose the first one to try, and of course he chose the only one with frosting, Hershey's Best Brownies.


These brownies were good, but they are not "it." They had the texture of a crumbly chocolate cake, not a dense fudgy brownie. They would be fantastic with ice cream, but not exactly what I'm looking for. I will say that they were quick and easy to make and used ingredients I always have on hand. I give them 3 out of 5 stars.

Hershey's Best Brownies

  • 1/2 C (1 stick) butter or margarine, melted
  • 1 C sugar
  • 1 tsp. vanilla extract
  • 2 eggs
  • 1/2 C all-purpose flour
  • 1/3 C Hershey's Cocoa
  • 1/4 tsp. baking powder
  • 1/4 tsp. salt
  • 1/2 C chopped nuts (optional) (I left these out)
  • Creamy Brownie Frosting (recipe follows)
  1. Heat oven to 350. Grease 9-inch square baking pan.
  2. Stir together butter, sugar, and vanilla in bowl. Add eggs; beat well with spoon. Stir together flour, cocoa, baking powder, and salt; gradually add to egg mixture, beating until well blended. Stir in nuts, if desired. Spread batter evenly into prepared pan.
  3. Bake 20 to 25 minutes or until brownies begin to pull away from sides of pan. Cool completely in pan on wire rack. Prepare Creamy Brownie Frosting; spread over brownies. Cut into squares. About 16 brownies (Umm, the way we cut them, this made six brownies. If you cut them into sixteenths, they would be TINY).

Creamy Brownie Frosting

  • 3 Tbsp. butter or margarine, softened
  • 3 Tbsp. Hershey's Cocoa
  • 1 Tbsp. light corn syrup or honey
  • 1/2 tsp. vanilla extract
  • 1 C powdered milk
  • 1 to 2 Tbsp. milk
  1. Beat butter, cocoa, corn syrup (or honey), and vanilla in small bowl until blended. Add powdered sugar and milk; beat to spreading consistency. About 1 C frosting.

Slow Cooker Chicken Taco Soup

I saw this recipe on Foodie Melissa's blog and I knew I had to try it. I believe she got the recipe from AllRecipes.com. This was very good, and very easy for a weeknight meal. Next time I will try to use my own spices, instead of buying packaged taco seasoning.


  • 1 onion, chopped
  • 1 (16 oz) can chili beans (I assumed this meant red kidney beans)
  • 1 (15 oz) can black beans
  • 1 (15 oz) can whole kernel corn, drained
  • 1 (8 oz) can tomato sauce
  • 1 (12 fluid oz) can or bottle of beer
  • 2 (10 oz) cans diced tomatoes with green chiles, undrained
  • 1 (1.25 oz) package taco seasoning
  • 3 whole, skinless, boneless chicken breasts (I used 2 breast halves, and it was more than enough chicken)
  • I also added 2 cloves crushed garlic
  1. Place the onion, chili beans, black beans, corn, tomato sauce, beer, and diced tomatoes (and garlic) in slow cooker. Add taco seasoning, and stir to blend. Lay chicken breasts on top of the mixture, pressing down slightly until just covered by the other ingredients. Set slow cooker for low heat, cover, and cook for 5 hours.
  2. Remove chicken breasts from the soup, and allow to cool long enough to be handled. Stir the shredded chicken back into the soup, and continue cooking for 2 hours. Serve topped with shredded Cheddar cheese, a dollop of sour cream, and crushed tortilla chips, if desired. (I returned the chicken to the crock pot and just let it heat through -- the chicken was done).

Wednesday, January 2, 2008

Beef & Bean Chimichangas

This is my husband's favorite dinner. He would eat this every day for lunch and dinner if he could. And, since these chimis are baked (not fried), they are quite a bit healthier than the restaurant version. The small amount of butter brushed over the top makes them crispy. The picture is not great, but it was the best I could do -- my food photography skills leave something to be desired. ;)


Beef & Bean Chimichangas
Source: Allrecipes.com
  • 1 pound lean ground beef
  • 3/4 C chopped onion
  • 3/4 C diced green pepper
  • 1 1/2 C whole kernel corn (I use a whole can)
  • 2 C taco sauce
  • 2 tsp. chili powder
  • 1 tsp. garlic salt
  • 1 tsp. cumin
  • 1 (16 0z) can refried beans (I use fat-free, and don't notice a difference in taste)
  • 8 (12-inch) flour tortillas
  • 1 (16 oz) package shredded monterey jack cheese
  • 1 Tbsp. butter, melted
  • shredded lettuce
  • 1 tomato, diced
  1. Preheat oven to 350 degrees.
  2. Brown the ground beef in a skillet over medium-high heat. Drain excess grease, and add the onion, bell pepper, and corn. Cook for about 5 more minutes, or until vegetables are tender. Stir in the taco sauce, and season with chili powder, garlic salt and cumin, stirring until blended. Cook until heated through, then remove from heat, and set aside.
  3. Open the can of beans, and spread a thin layer of beans onto each of the tortillas. Spoon the beef mixture down the center, and then top with as much shredded cheese as you like. Roll up the tortillas, and place them seam-side down onto a baking sheet. Brush the tortillas with melted butter.
  4. Bake for 30 to 35 minutes in the preheated oven, or until golden brown. Serve with lettuce and tomato.

Tuesday, January 1, 2008

Breakfast Casserole

My sister-in-law gave this recipe to my mother-in-law, who gave it to me after I insisted that I MUST have it. This is so easy and versatile. And, since you can make it the night before, it is perfect for when you have company. I made it last night before company arrived and popped it in the oven this morning. Next time I will try it with asparagus, green pepper, ham, and maybe some frozen shredded potatoes thrown in -- yum!


Chrissy's Breakfast Casserole

  • 3 C chopped vegetables (I used zucchini and red bell pepper)
  • 1 medium onion, chopped
  • 3/4 C EACH shedded cheddar, mozzarella, and parmesan cheeses
  • 5 eggs, beaten
  • 1/2 C olive oil
  • 1 C baking mix (such as Bisquick)
  • salt and pepper, to taste
  • 1 fully cooked ham steak, diced
  1. Spray and flour a 9X13 inch glass baking dish.
  2. Combine all ingredients and spread in pan. Refrigerate overnight.
  3. Preheat oven to 350 degrees. Bake in preheated oven for 30 minutes.

Fudge, Fudge, Fudge!

I made fudge for Christmas gifts this year. I usually stick to just plain fudge with and without nuts, but this year I switched it up a bit. I made three types -- chocolate with nuts, chocolate with peanut butter, and a twist on peppermint bark (white chocolate peppermint/semi-sweet chocolate). They were all incredibly easy and turned out so well. The basic recipe as well as my modifications are below.

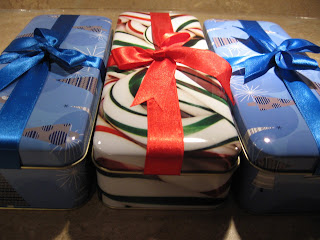
Never Fail Fudge (from the back of the Fluff jar)

  • 5 C sugar
  • 1 large (12 oz) can evaporated milk
  • 1/4 lb butter or margarine
  • 12 oz marshmallow fluff
  • 1 tsp salt
  • 1 tsp vanilla
  • 1 C walnut meats (I used chopped pecans)
  • 2 large (12 oz) packages semi-sweet chocolate pieces
  1. Combine first five ingredients in large sauce pan. Stir over low heat until blended.
  2. Bring to boil over moderate heat, being careful not to mistake escaping air bubbles for boiling. Then boil slowly, stirring constantly for five minutes (use soft ball test).
  3. Remove from heat. Stir in chocolate and vanilla (and nuts if used) until chocolate is melted. Pour into 2 buttered 9X9 inch pans (I used one 9X13 inch pan) and cool. Yield: approximately 5 pounds.

Peanut Butter Chocolate Fudge

I made a half-batch of the chocolate fudge above (without nuts) and spread it in a 9X13 pan. While that cooled, I made another batch, substituting 2 bags of peanut butter chips for the chocolate chips, and again excluding the nuts. I spread this on top of the chocolate fudge.

White Chocolate Peppermint Fudge

I again made a half batch of the chocolate fudge and spread it in a 9X13 pan. While that cooled, I made another batch, substituting 2 bags white chocolate chips for the chocolate chips, and 1/2 tsp. peppermint extract for the vanilla, again excluding the nuts. I spread this on top of the chocolate fudge and topped with crushed candy canes. This one was by far my favorite.

Notes

With all three batches combined, I had a ridiculous amount of fudge. I filled ten containers with fudge and still had a TON leftover. One thing I would change for next time -- for the peanut butter and white chocolate peppermint batches, I would halve both recipes because the fudge was waaaaay too thick.